Classic Editor
The classic editor is the most advanced tool where users can directly configure the index mapping with all capabilities.
You can build the exact same index via the command line use the REST API, refer to Creating a One Field Index via the REST API.
This section introduces index creations via a step by step walk through using the classic editor. The reader should be already familiar with the basic concepts of full-text search
This example Creating a One Field Index starts to introduce advanced feature for optimizing and using a focused Search index. However it should be noted that it only scratches the surface and does not cover: adding multiple collections under a scope; adding multiple field or fields from sub-objects; alternative analyzers, and geospatial features.
Creating a One Field Index via the UI
This section describes creating and Index on a bucket’s collection on just one field created on a non-default scope/collection.
To create an one field Search index on the bucket: travel-sample, scope: inventory, collection: landmark, and field: content, through the Classic Editor:
-
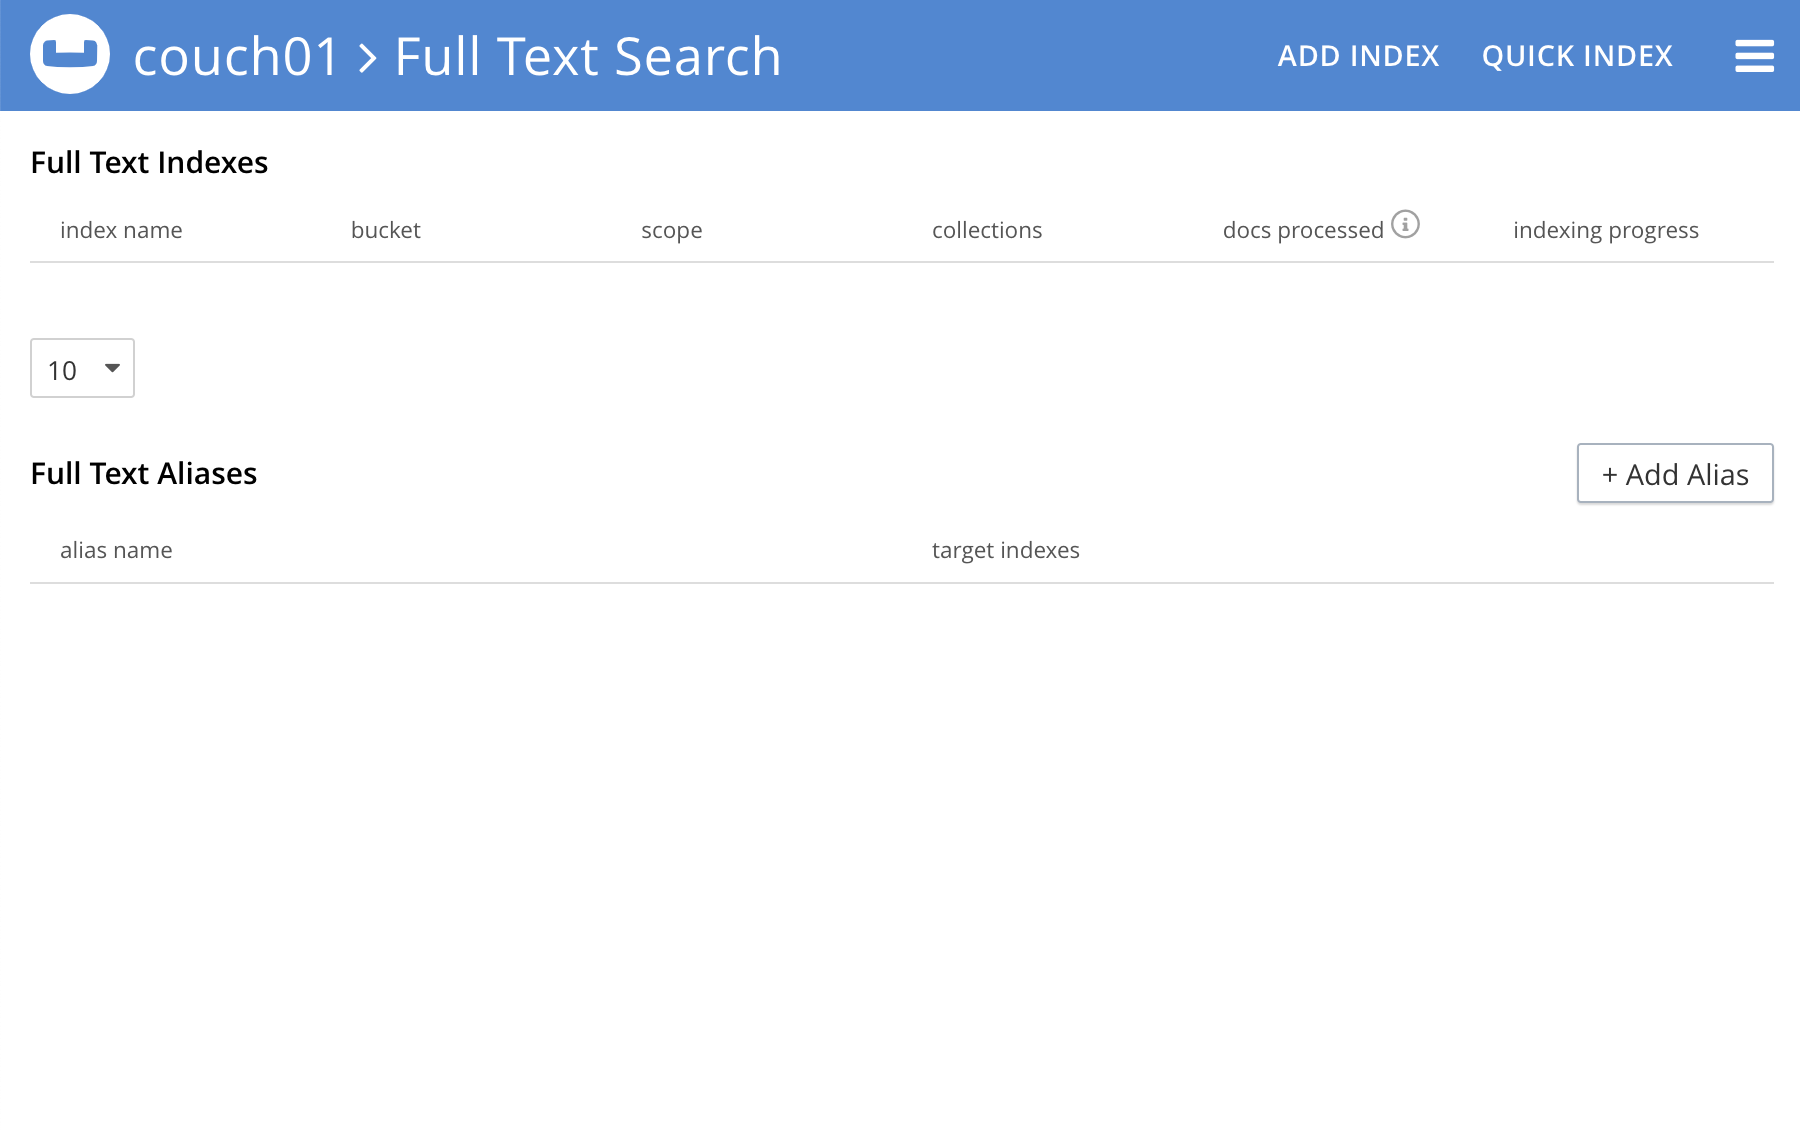
Access the Couchbase Web Console > Search page.
-
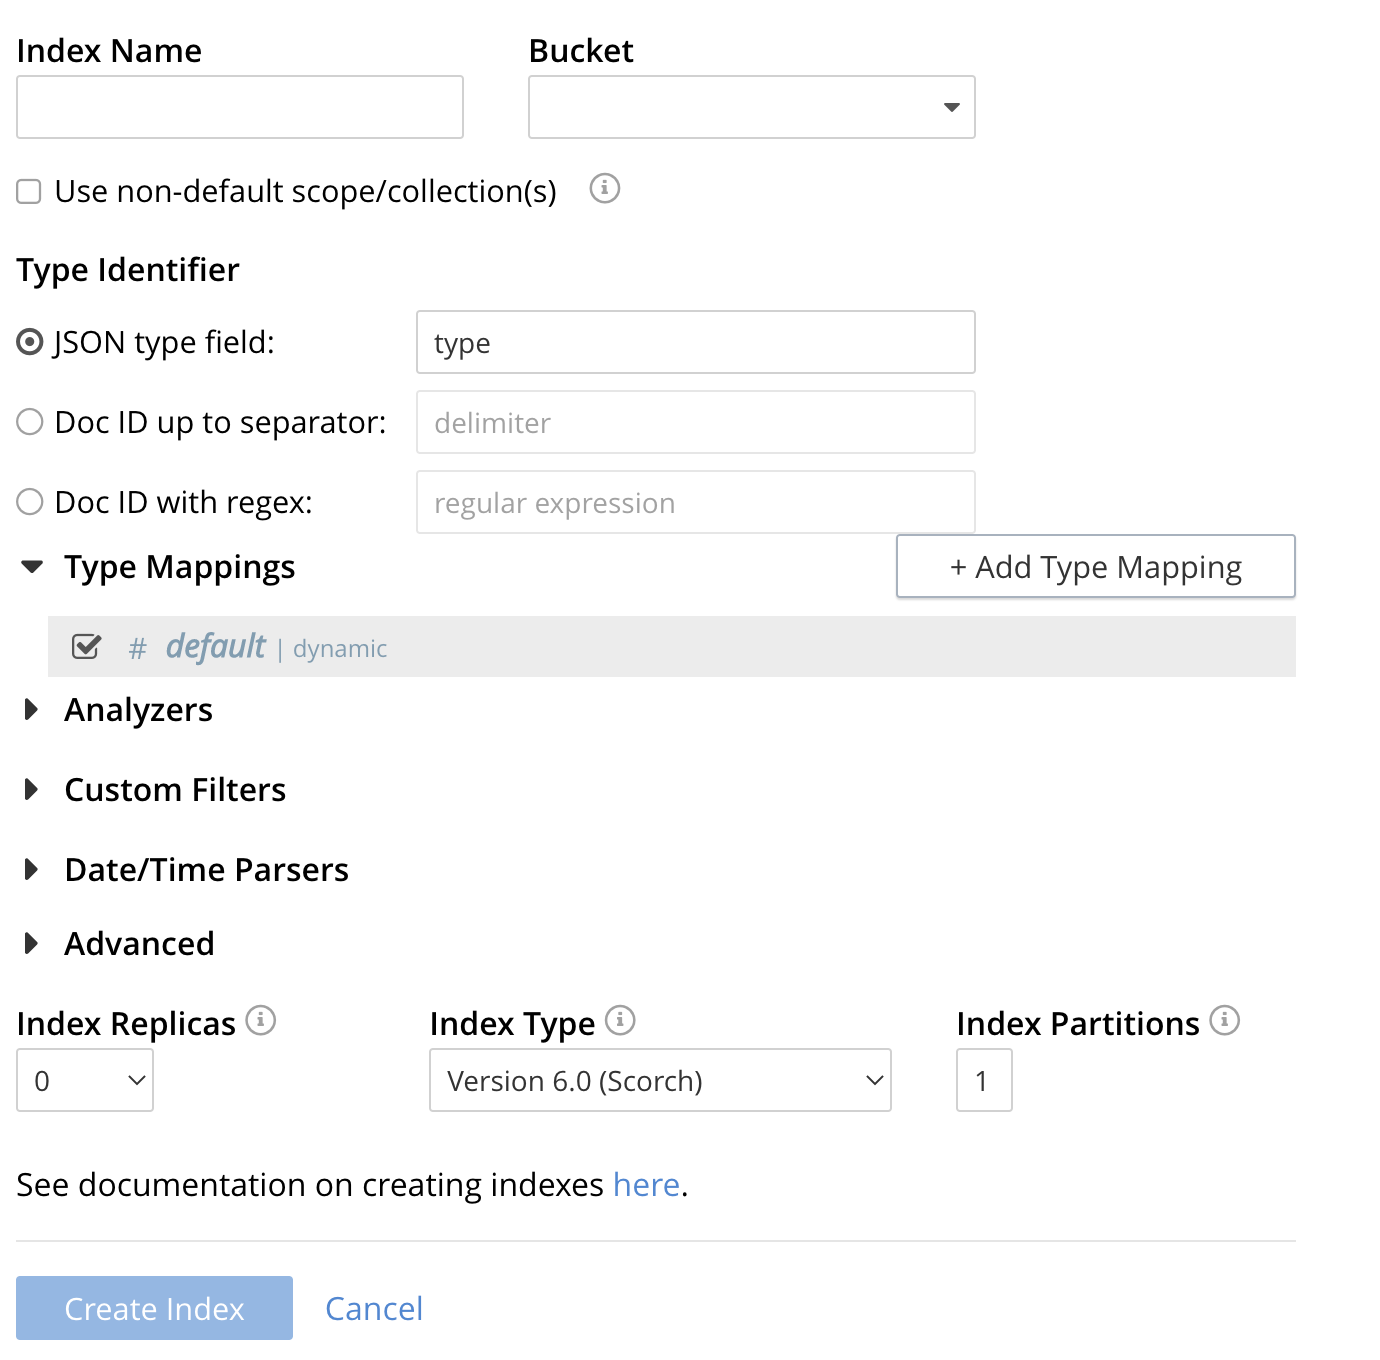
Click the Add Index link in the upper right of the Couchbase Web Console > Search page.
-
To define any index on which Full Text Search a unique name for the index in the Index Name field, on the upper-left. Note that only alphanumeric characters, hyphens, and underscores are allowed for index names and the first character of the name must be alphabetic.
Enter landmark-content-index as the name of the Search index you are creating in the Index Name text-box.

-
Select the bucket travel-sample from the Bucket pull-down menu.
Use the pull-down menu provided for the Bucket field, on the upper-right, and select a bucket that you are allowed to access to via the cluster’s RBAC settings.

-
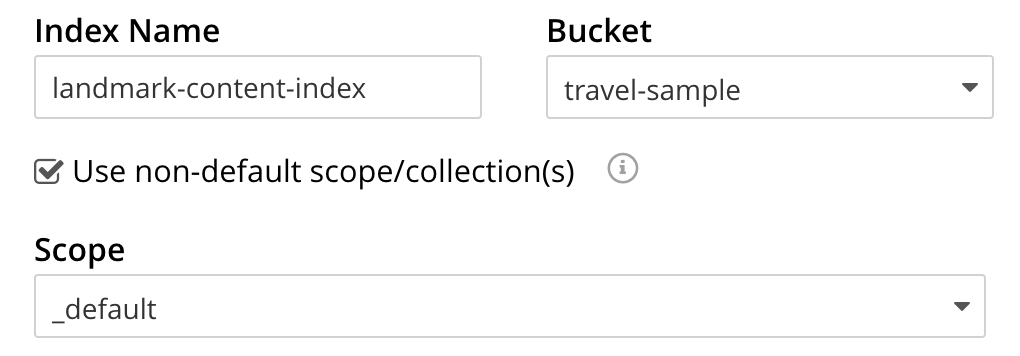
Select the checkbox [X] Use non-default scope/collections
This allows your index to stream mutations from one or more non-default collections under the selected bucket and scope.
-
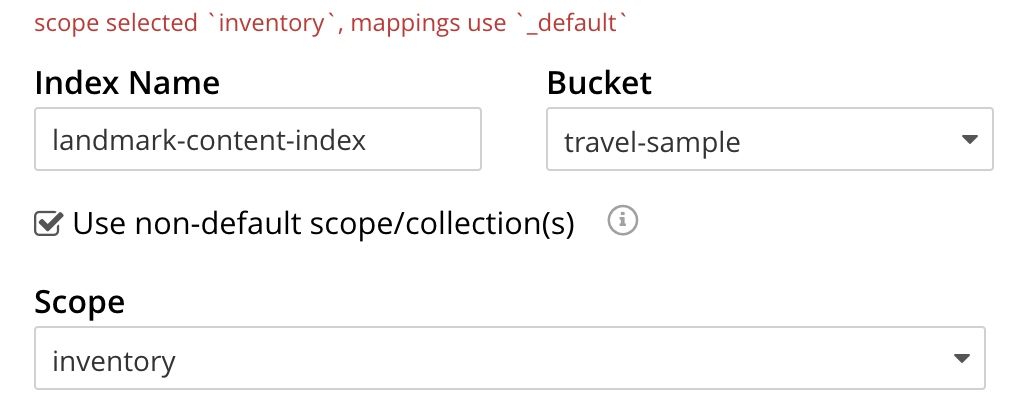
Use the newly visible pull-down menu provided for the Scope field, under the [X] Use non-default scope/collections checkbox, and select a bucket that you are allowed to access to via the cluster’s RBAC settings.
For this example select inventory which has multiple collections under it.
-
Under Type Mapings, unselect the checkbox [ ] default | dynamic - this will get rid of the warning in the prior step.
This is required as this type mapping (the default mapping) is only valid for the <bucket>._default._default which is typically used to upgrade a 6.X server from a bucket into a more powerful collections paradigm.

-
Click on the button + Add Type Mapping
-
A new section with a Collection pull-down, Analyzer pull-down and a [ ] only index specified fields checkbox will appear.

-
Select landmark from the Collection pull-down, note the pull down will change to a text field prefilled with inventory.landmark
-
Check the [X] only index specified fields checkbox.

-
Click on the blue ok at the right of the section to save this mapping.
-
Hover over your newly created/saved row
-
Click on the blue + button the right side of the row.

-
A context menu of "insert child mapping" (for sub-objects) and "insert child field" (for properties) will appear.

-
Select insert child field
-
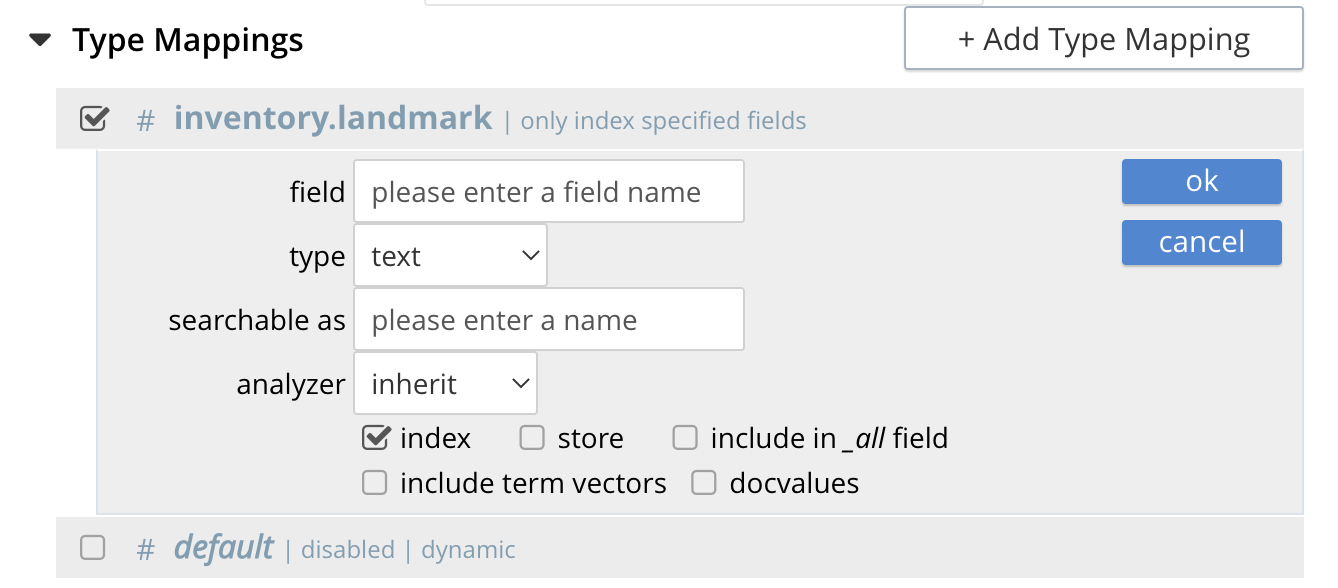
another row menu will appear with the following controls: "field", "type", "text", "searchable as", "analyzer" "inherit", "index", "store", "include in _all field", "include term vectors", and "docvalues".
-
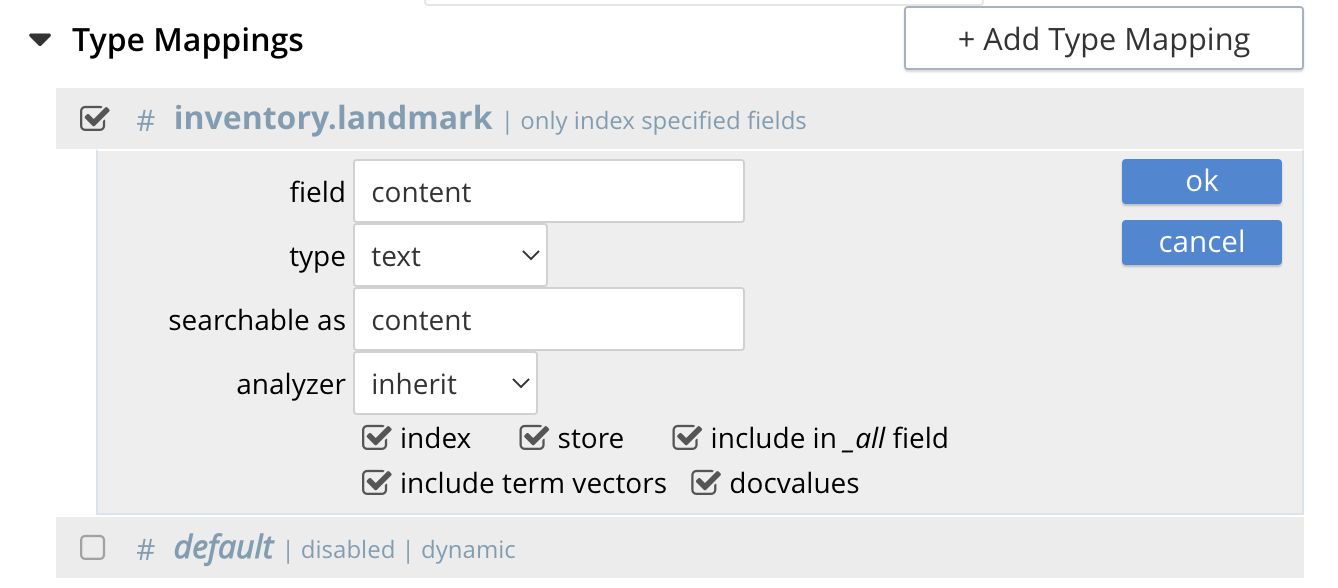
Set the text box field to content, this will also update "searchable as" to content.
-
Check [X] all the boxes "store", "include in _all field", "include term vectors", and "docvalues"
-
Click on the blue ok at the right of the section to save this sub-form.
-
-
Save your index, left-click on the Create Index button near the bottom of the screen.
This is all you need to specify in order to create a more advanced index for test and development. No further configuration is required.

-
If you subsequently Edit your Index it should look like the following:
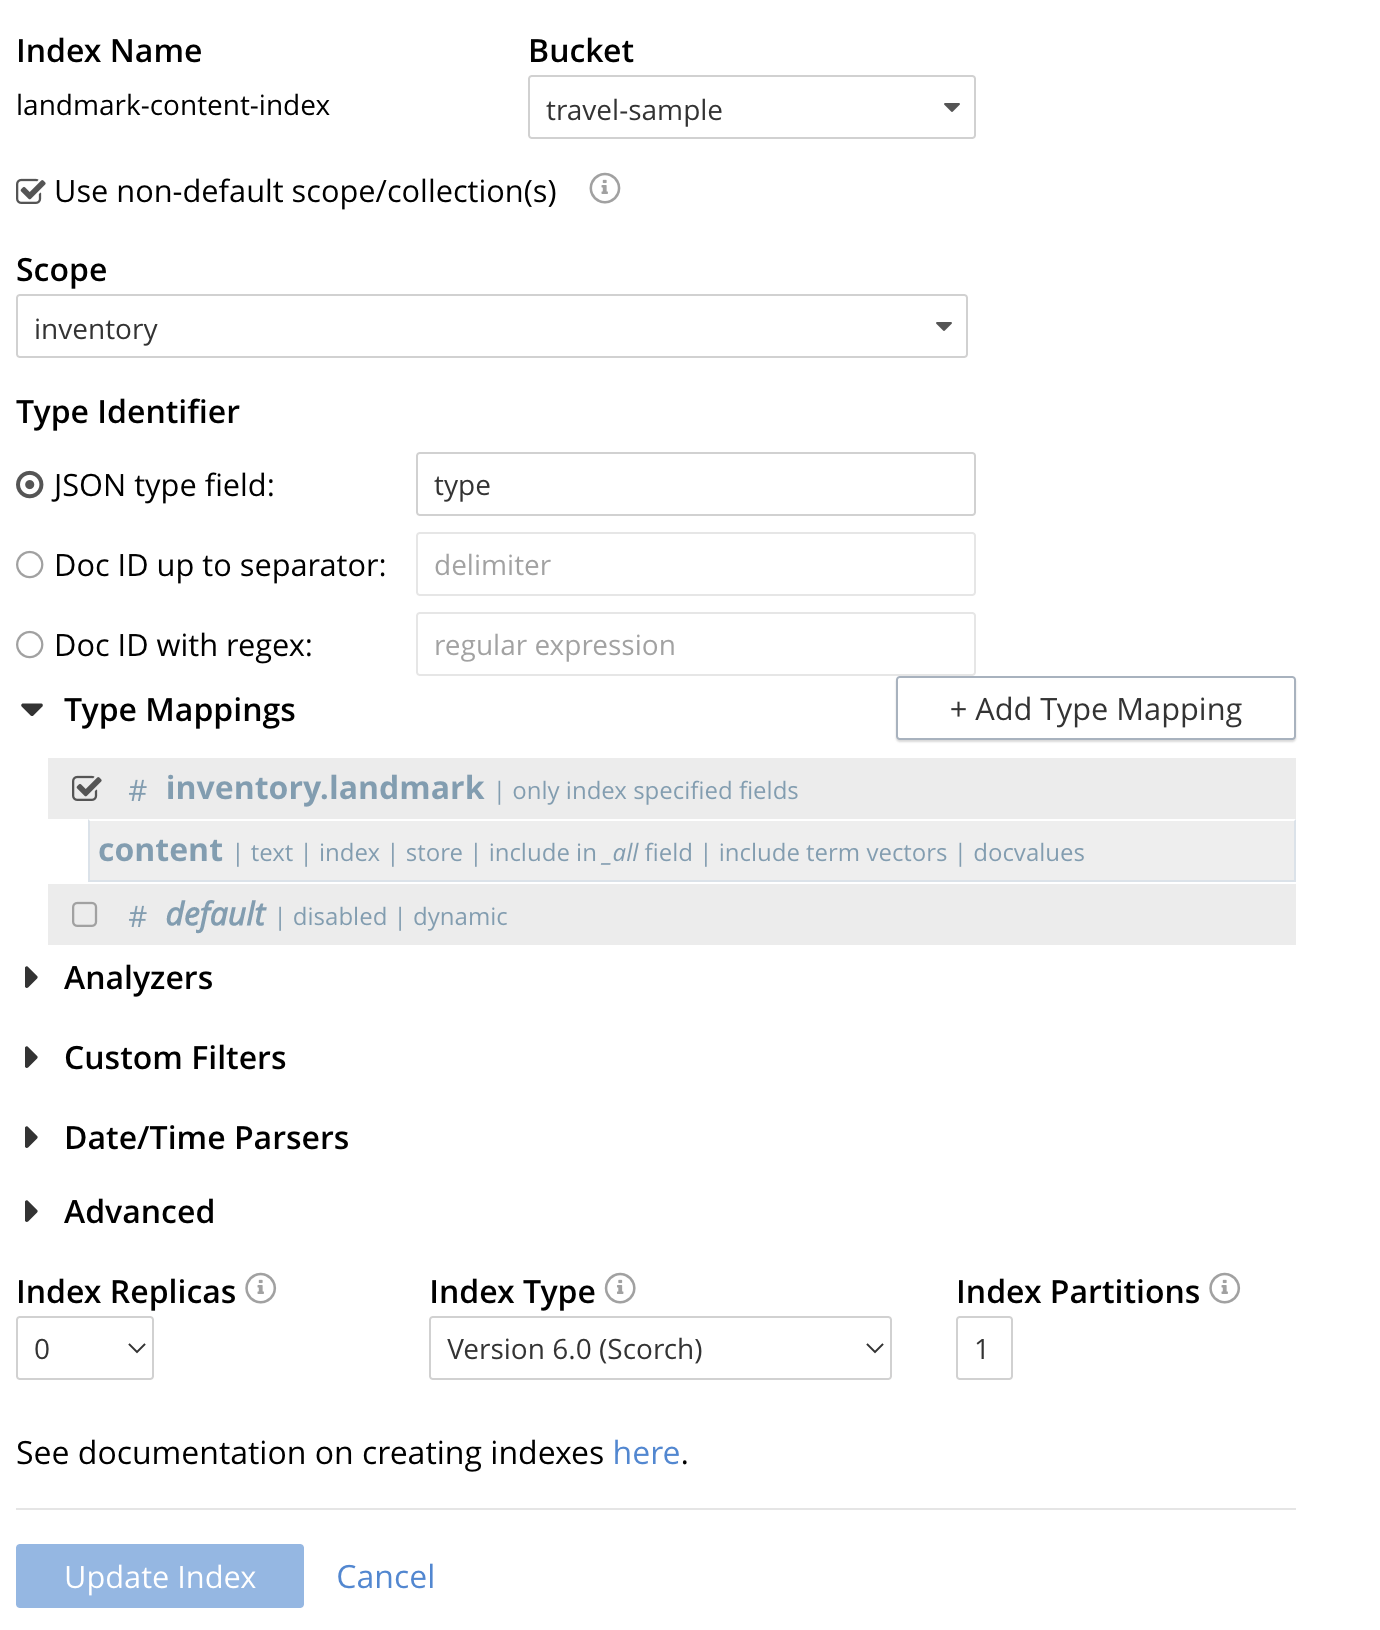
| This index is an example of a potentially optimal index for use in a production environments since it creates only on index on a needed field as such it will be more performant that the first example. |
Test the One Field Index with a simple query
In the Couchbase Web Console > Search page.
-
Click on the index you just created (named "landmark-content-index") to expand the Index’s controls.
-
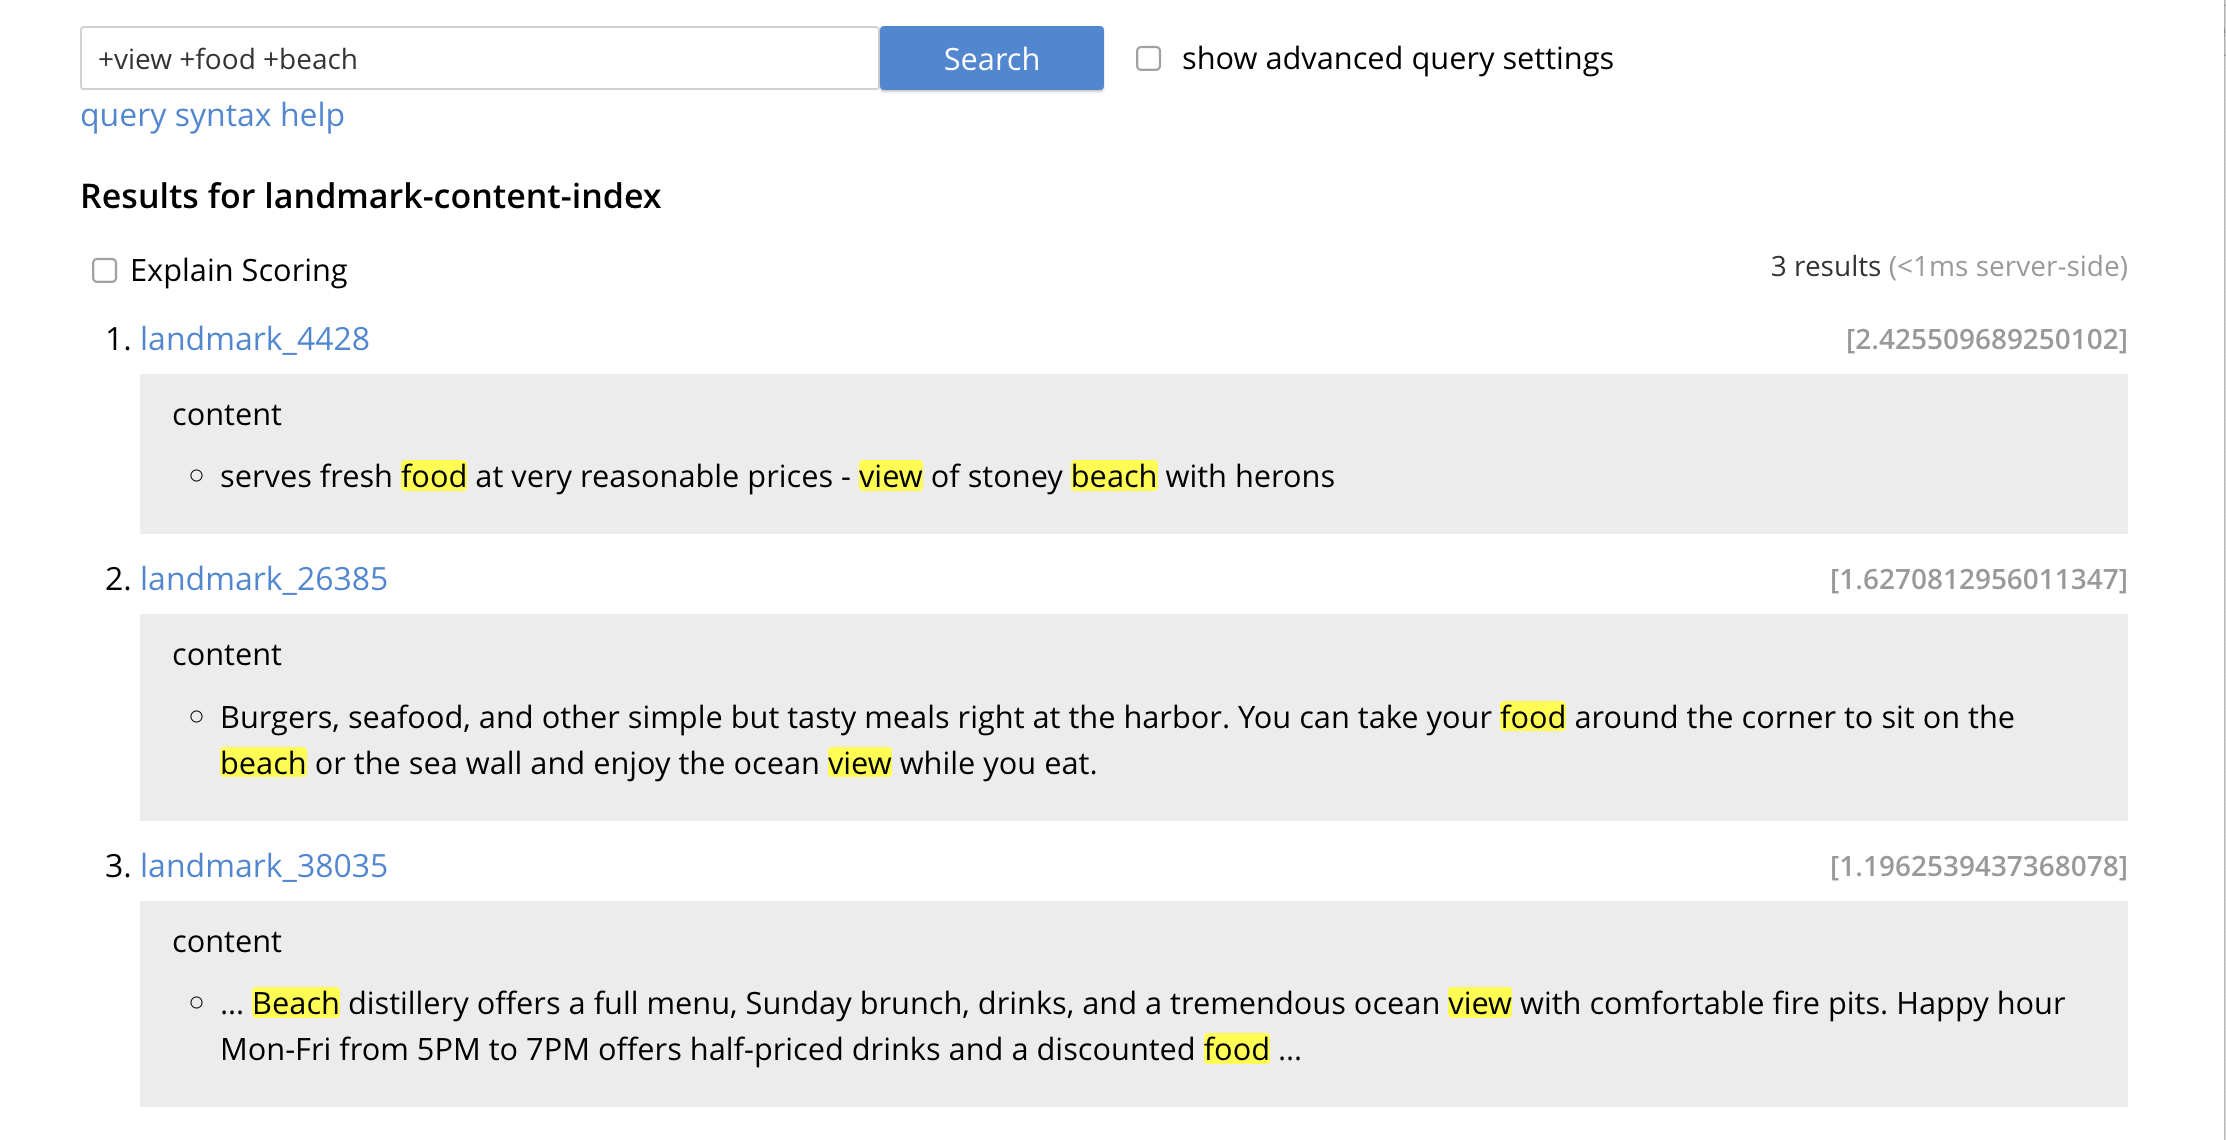
In the text area of the search box enter +view +food +beach this will search on all three keywords
-
Click on the blue Search button. You will get documents from only collection landmark and due to the options you selected you will see highlighted words in your results.

-
Verify you have some results
Advanced Index Settings and Other Features in the UI
The complete range of available options for creating Search indexes for any production environment is covered here: Creating Indexes.
Once you hit the Create Index button you will return to the Couchbase Web Console > Search page (note, if you tested any index just access the Couchbase Web Console > Search page again).
At this point, you are returned to the Full Text Search screen.
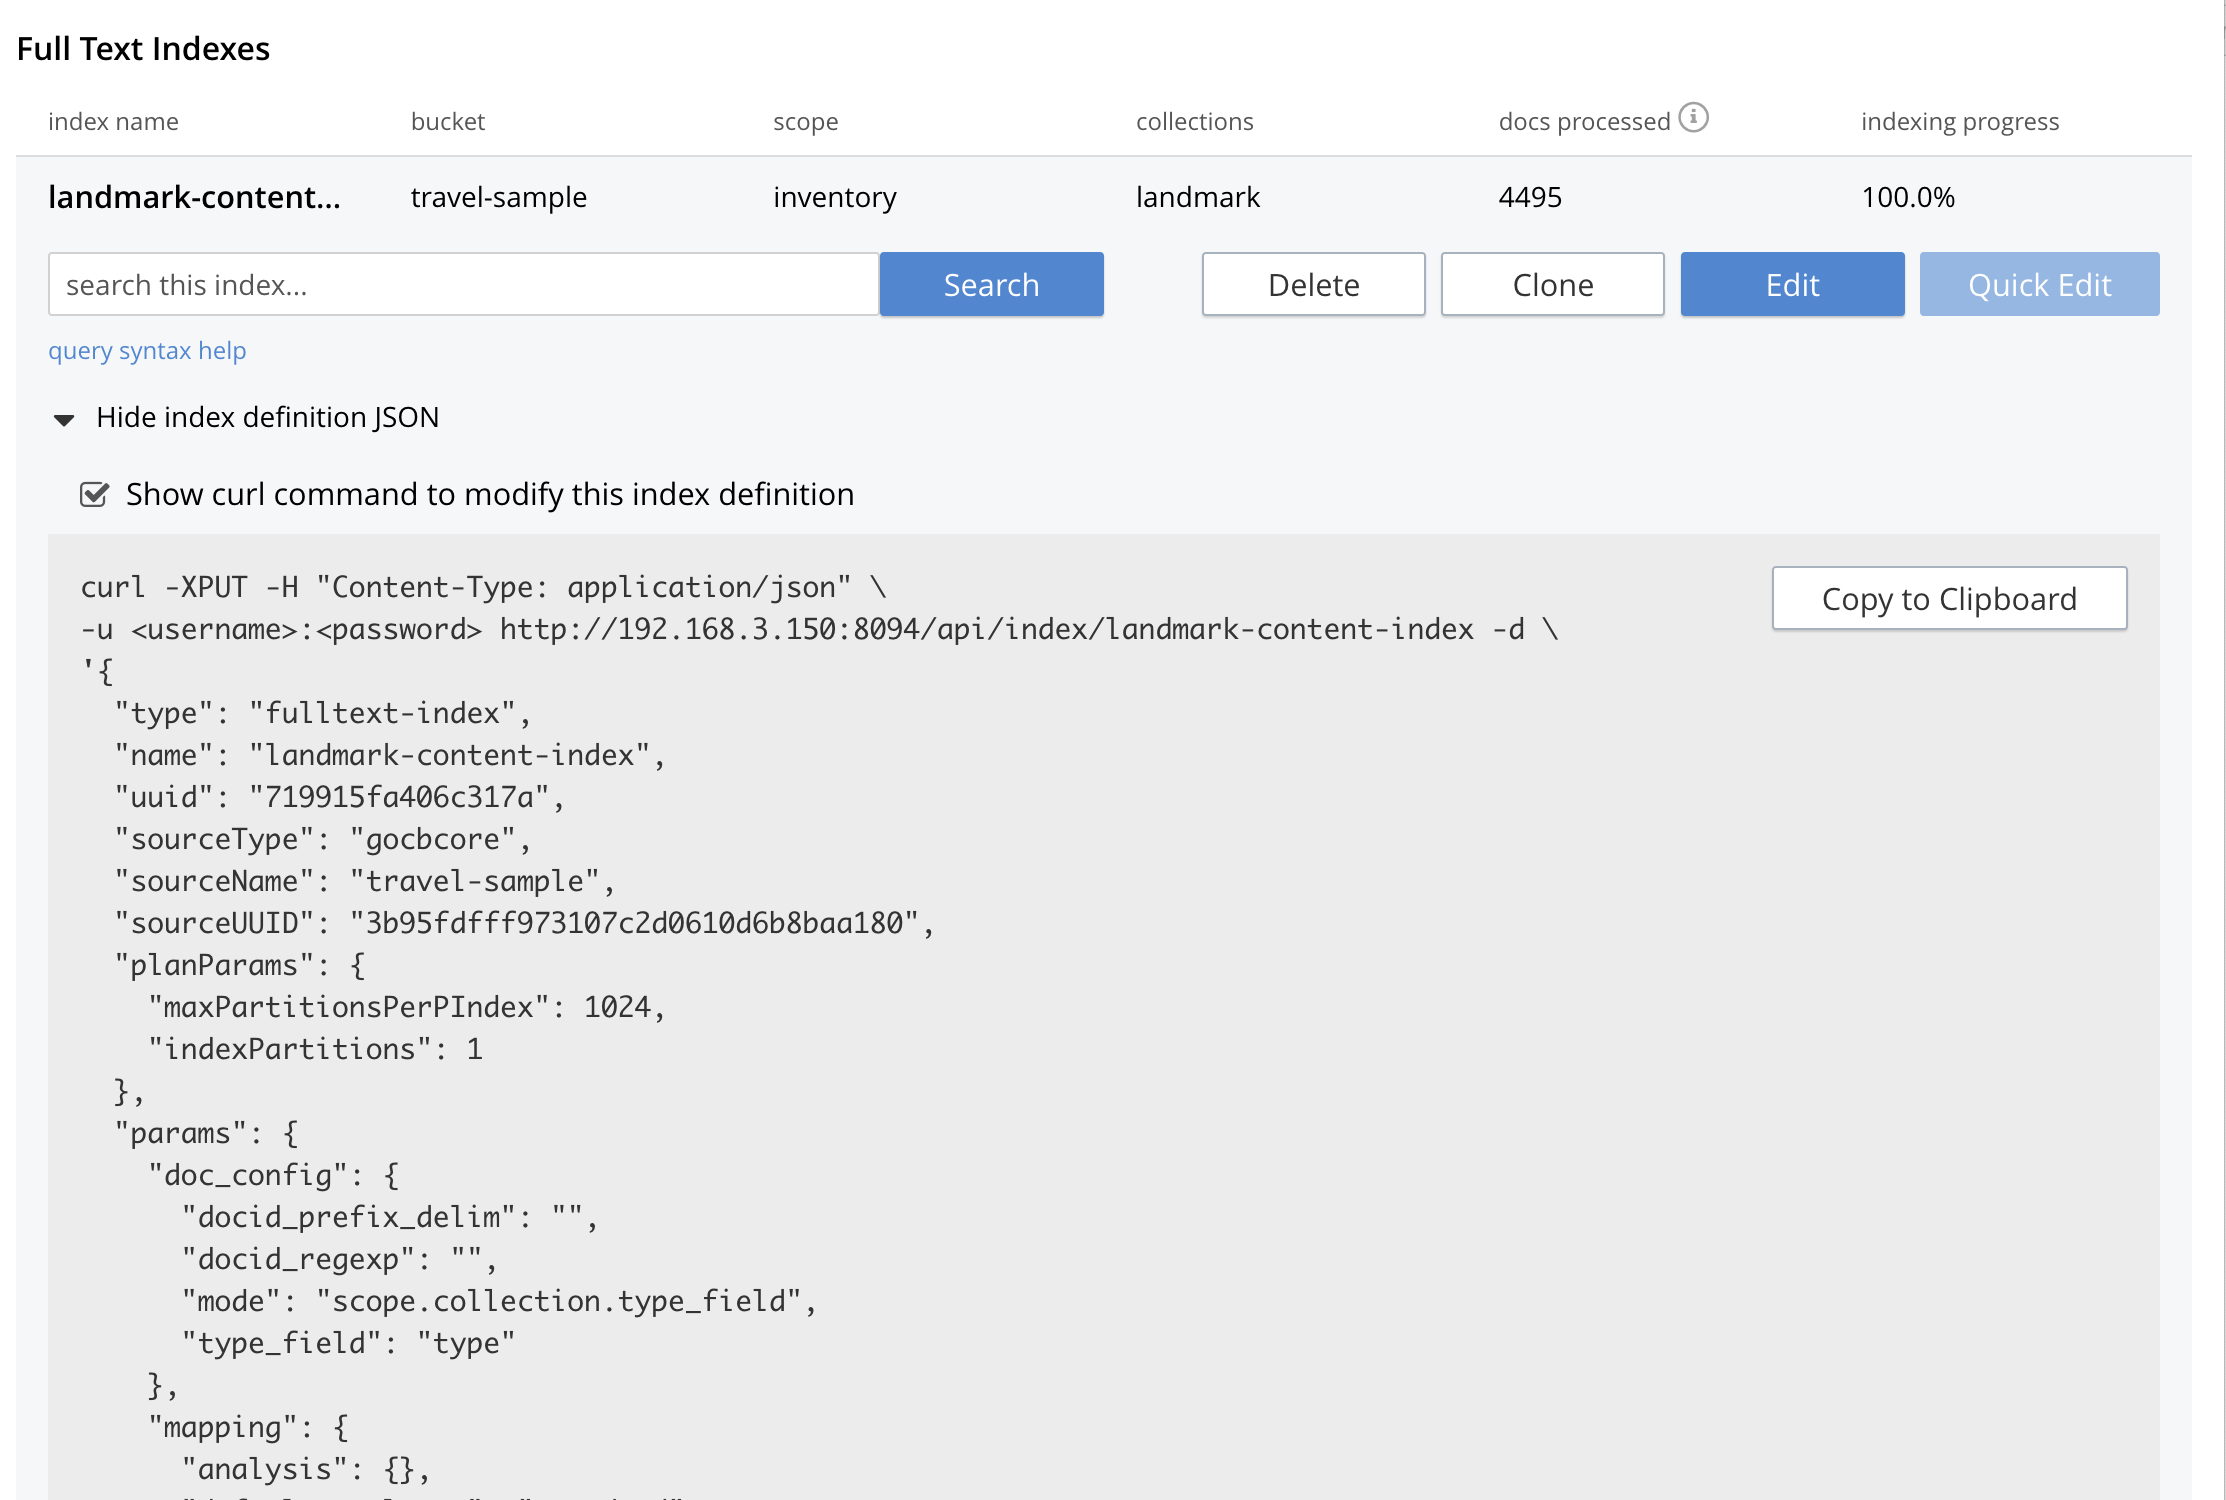
A new row now appears for the index you have just created. When left-clicked on, the row opens or expands as follows:

Index Build Progress
Once the new index has been built, it supports Full Text Searches performed by all available means: the Console UI, the Couchbase REST API, and the Couchbase SDK.
Statistic: docs processed
The percentage figure appears under the indexing progress column and represents the number of documents present in the index.
-
On an initial build this may take a while to process all the documents.
-
A mutation to an existing document will not increment this count (unless new items are added).
Statistic: indexing progress
The percentage figure appears under the indexing progress column and is incremented in correspondence with the build-progress of the index. When 100% is reached, the index build is complete.
-
However, search queries will be allowed as soon as the index is created, meaning partial results can be expected until the index build is complete.
-
If later mutations com in the percentage may actually jump around as batches of documents are processed.
-
If one or more of the nodes in the cluster running data service goes down and/or are failed over, indexing progress may show a value > 100%.
Show Index Definition
This expandable section shows the JSON document that describes the current index configuration, as created by means of the user interface.
A checkbox [ ] Show curl command to modify this index definition is set will wrap the index definition with a command line cURL syntax.
You can copy either variant (the cURL mode) and the definitions can be used via the Search REST API or any Couchbase SDK.
Using the Index Definition Preview
The Index Definition Preview appears to the right-hand side of the Add Index (or an Edit Index) screen.
Following index-definition, the upper portion may appear as follows:
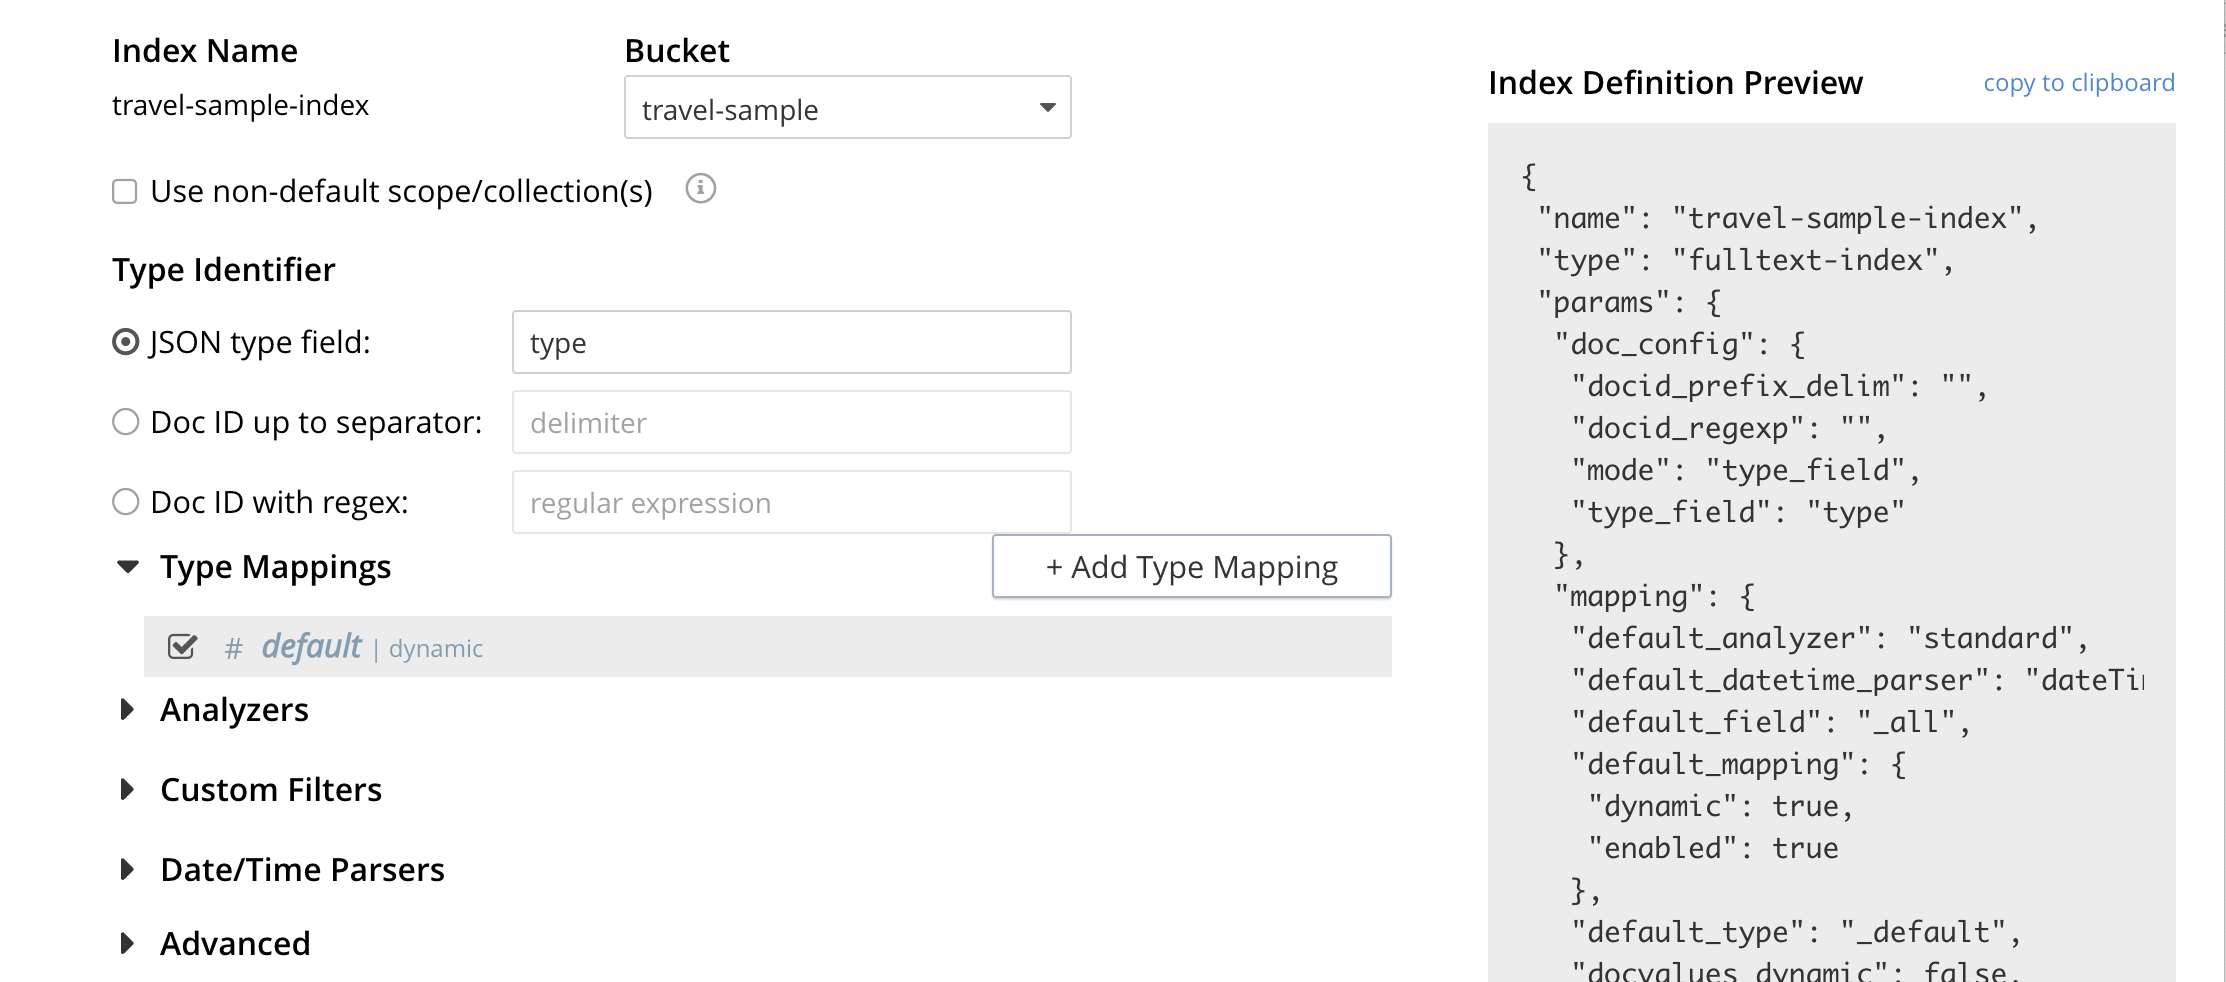
This preview (like the Show Index Definition JSON from the main Search page) consists of the JSON document that describes the current index configuration, as created by means of the user interface. By left-clicking on the copy to clipboard tab, the definition can be saved.
These definitions can be used via the Search REST API or any Couchbase SDK.
Advanced Index Configuration Options
The complete range of available options for creating Search indexes for any production environment is covered here: Creating Indexes.