Install Couchbase Server on macOS
Couchbase Server can be installed on macOS for development use-cases.
Use the instructions on this page to install Couchbase Server on macOS platforms using Couchbase-provided application packages. The instructions support both Enterprise and Community editions.
If you’re upgrading an existing installation of Couchbase Server, refer to Upgrading Couchbase Server.
Before You Install
Couchbase Server works out-of-the-box with most OS configurations. However, the procedures on this page assume the following:
-
Your system meets the minimum requirements and that your operating system version is supported.
-
You’re working from a clean system and that you’ve uninstalled any previous versions of Couchbase Server.
If you’re upgrading an existing installation of Couchbase Server, refer to Upgrading Couchbase Server.
Although macOS is not supported for production deployments, you should still review the deployment guidelines for more information about best practices.
Basic Installation
-
Download the appropriate package from the Couchbase downloads page.
Couchbase Server for macOS is packaged as a standalone application in a compressed disk image.
-
Mount the the downloaded
.dmgfile.Locate the downloaded Couchbase Server
.dmgfile (typically located in the default~/Downloadsfolder) and double-click it. Opening the file will automatically mount a volume in Finder containing theCouchbase Server.appapplication file. -
Drag-and-drop the
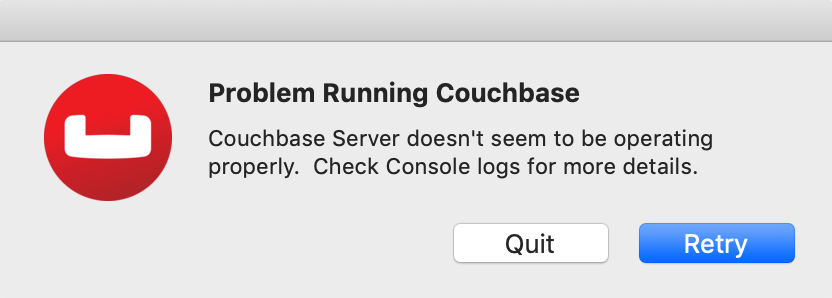
Couchbase Server.appfile into the system/Applicationsfolder.macOS has a security policy that requires downloaded software to be run directly from the
/Applicationsfolder. Attempting to openCouchbase Server.appfrom any other folder or sub-folder will result in a "Problem Running Couchbase" error.
-
Double-click
Couchbase Server.appto start Couchbase Server.A macOS Gatekeeper dialogue will appear asking if you want to open
Couchbase Server.app. Click Open to continue.Couchbase Server runs as a background application. When Couchbase Server starts, the Couchbase Server icon
 will appear in the menu bar.
 -
Open a web browser and access the Couchbase Web Console to verify that the installation was successful and the node is available.
You can open the Couchbase Web Console by clicking
 and then selecting Open Admin Console.
Although the Couchbase Server software resides in the /Applications folder, the Couchbase data files are stored in other folders.
For more information, refer to Uninstalling Couchbase Server.
Terminal-based Installation
As an alternative to the UI-based installation, you can install Couchbase Server using the Terminal.
-
Download the appropriate package from the Couchbase downloads page.
Couchbase Server for macOS is packaged as a standalone application in a compressed disk image.
-
Mount the the downloaded
.dmgfile.hdiutil attach couchbase-download.dmgThe image will mount a volume in containing the
Couchbase Server.appapplication file. -
Copy the
Couchbase Server.appfile into the system/Applicationsfolder.cp -R /Volumes/volume-name/Couchbase\ Server.app /Applications -
Remove the Gatekeeper quarantine flag from
Couchbase Server.app.sudo xattr -d -r com.apple.quarantine /Applications/Couchbase\ Server.app -
Start Couchbase Server.
open -a Couchbase\ Server.appCouchbase Server runs as a background application. When Couchbase Server starts, the Couchbase Server icon
 will appear in the menu bar of the macOS UI.
 -
Open a web browser and access the Couchbase Web Console to verify that the installation was successful and the node is available.
Although the Couchbase Server software resides in the /Applications folder, the Couchbase data files are stored in other folders.
For more information, refer to Uninstalling Couchbase Server.
Accessing the CLI Tools
On macOS, the Couchbase Server command line interface (CLI) tools are included in the Couchbase Server.app application directory:
/Applications/Couchbase\ Server.app/Contents/Resources/couchbase-core/bin
To browse the commands in Finder, right-click on Couchbase Server.app, select Show Package Contents, and then go to /Contents/Resources/couchbase-core/bin.
Next Steps
Following installation and start-up of Couchbase Server, a node must be initialized and provisioned.
-
If it is the first node in a deployment, initialization and provisioning happens all at once when you create a cluster of one.
Refer to Create a Cluster
-
If you already have an existing cluster, the node is initialized and provisioned when you add it to the cluster.
Refer to Add a Node and Rebalance
-
Optionally, initialization can be performed explicitly and independently of provisioning, as a prior process, in order to establish certain configurations, such as custom disk-paths.
Refer to Initialize a Node